





The Anatomy of a Candlestick
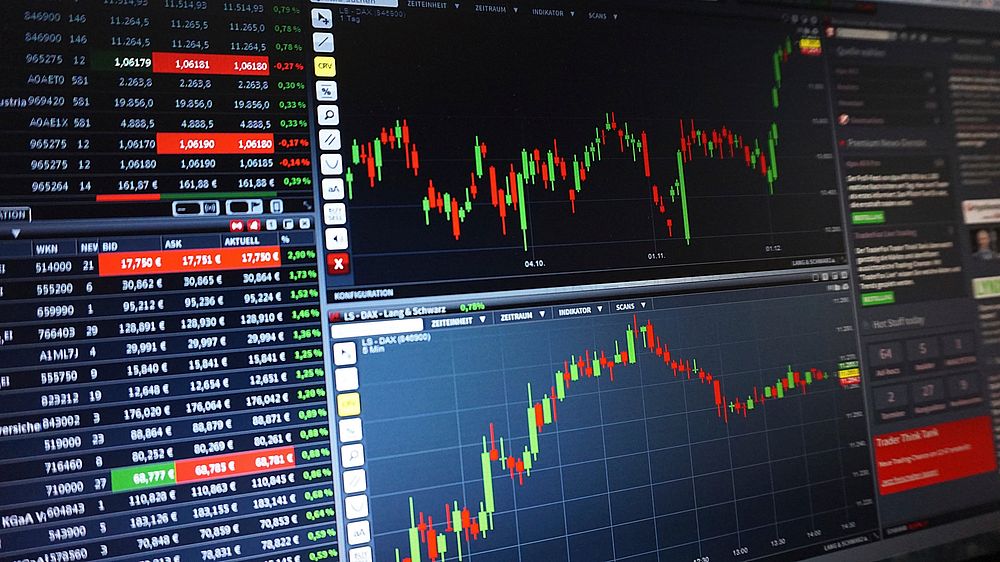
A candlestick visualizes four critical price points within a specific timeframe: the open, high, low, and close (OHLC). The rectangular body represents the distance between the opening and closing prices. A filled or colored body—typically green or white—indicates a bullish session where the close exceeded the open. A hollow or dark body—typically red or black—signals a bearish session where the close fell below the open. The thin lines extending from the body, known as wicks or shadows, mark the session’s highest and lowest prices. The length of the body reveals the strength of buying or selling pressure, while the length of the wicks indicates price rejection at extreme levels. A long upper wick suggests sellers rejected higher prices, whereas a long lower wick implies buyers defended lower levels. Mastering this anatomy is the foundation for interpreting every pattern that follows.
Doji: Indecision and Equilibrium
A Doji forms when the open and close are virtually identical, creating a cross or plus-sign shape. This pattern signals market indecision, as neither bulls nor sellers could establish dominance. The Gravestone Doji features a long upper wick and no lower wick, indicating buyers pushed prices up but sellers aggressively rejected the advance—a potential bearish reversal signal near resistance. The Dragonfly Doji shows a long lower wick with no upper wick, suggesting sellers drove prices down but buyers reclaimed control—a potential bullish reversal near support. The Long-Legged Doji has equally long upper and lower wicks, reflecting extreme volatility and confusion. Context matters: a Doji after an extended trend carries more reversal weight than one in a sideways market. Traders should wait for confirmation from the next candle before acting.
Hammer and Hanging Man: Twins with Opposite Meanings
Both patterns share an identical shape: a small body near the top and a long lower wick at least twice the body’s length, with little or no upper wick. The Hammer appears after a downtrend, signaling that sellers pushed prices lower but buyers forcefully rejected the lows and drove the close near the high. This suggests potential bullish reversal. The Hanging Man appears after an uptrend and carries bearish implications, as the long lower wick reveals selling pressure emerging despite the prior rally. The key differentiator is location within the trend, not shape. Volume confirmation strengthens both signals—a Hammer with above-average volume indicates genuine buying interest, while a Hanging Man on heavy volume suggests distribution. Inverted versions—the Inverted Hammer and Shooting Star—feature long upper wicks and small bodies, with the former appearing in downtrends (bullish) and the latter in uptrends (bearish).
Engulfing Patterns: Momentum Shifts
The Bullish Engulfing pattern consists of a small bearish candle followed by a larger bullish candle whose body completely engulfs the prior body. This signals a decisive shift from selling to buying pressure and carries the most weight when it appears at support levels or after prolonged declines. The Bearish Engulfing pattern reverses this logic: a small bullish candle followed by a larger bearish candle that engulfs the prior body, indicating sellers have overwhelmed buyers. Volume is critical here—engulfing patterns on low volume often fail. Traders frequently use the engulfing candle’s low (for bullish) or high (for bearish) as a stop-loss reference. When an engulfing pattern aligns with a key moving average or Fibonacci retracement level, its reliability increases substantially.
Harami: Inside-Day Compression
The Harami pattern features a small candle contained entirely within the prior candle’s body—the “inside day” concept. A Bullish Harami occurs when a large bearish candle is followed by a small bullish candle within its range, suggesting selling momentum is exhausting. A Bearish Harami shows a large bullish candle followed by a small bearish candle inside its range, indicating buying momentum is fading. The Harami reflects contraction in volatility and often precedes a breakout. Unlike engulfing patterns, Harami signals require more confirmation because the pattern itself represents pause rather than reversal. Traders often wait for a close beyond the mother candle’s high or low before committing. The Harami Cross, where the second candle is a Doji, carries stronger reversal implications due to the added indecision signal.
Morning Star and Evening Star: Three-Candle Reversals
The Morning Star is a bullish three-candle formation: a long bearish candle, a small-bodied candle (often a Doji or spinning top) gapping below, and a long bullish candle closing well into the first candle’s body. This sequence captures the transition from selling dominance to indecision to buying dominance. The Evening Star mirrors this bearishly: a long bullish candle, a small-bodied candle gapping above, and a long bearish candle closing into the first candle’s body. These patterns are among the most reliable reversal signals when they appear at trend extremes with volume confirmation. The depth of the third candle’s penetration into the first candle’s body matters—deeper penetration indicates stronger reversal conviction. Traders should note that gaps may not appear in all markets, particularly forex, where the pattern’s logic still applies without literal gaps.
Marubozu: Full-Body Conviction
A Marubozu is a candle with no wicks—the open equals the low and the close equals the high (bullish Marubozu) or the open equals the high and the close equals the low (bearish Marubozu). This pattern represents total dominance by one side throughout the session. A bullish Marubozu signals aggressive buying from open to close; a bearish Marubozu signals relentless selling. Marubozu candles often appear at the beginning of trends or as breakout candles from consolidation. When a Marubozu forms after a period of tight range compression, it frequently marks the start of a sustained directional move. However, a Marubozu at the end of an extended trend can signal climax and exhaustion rather than continuation.
Spinning Tops: Volatility Without Direction
A Spinning Top features a small body with upper and lower wicks of roughly equal length. It indicates that both buyers and sellers were active but neither achieved dominance—a equilibrium or indecision candle. Spinning Tops frequently appear within consolidation phases or at turning points. A single Spinning Top carries limited predictive value, but clusters of them suggest weakening trend momentum. When a Spinning Top follows a strong directional candle, it often warns that the prevailing move is losing steam. Traders treat Spinning Tops as caution flags rather than entry signals, waiting for subsequent price action to clarify direction.
Three White Soldiers and Three Black Crows
Three White Soldiers consists of three consecutive long bullish candles, each opening within the prior candle’s body and closing near its high. This pattern signals strong, sustained buying pressure and typically appears at the end of downtrends or the start of uptrends. Three Black Crows is the bearish counterpart: three consecutive long bearish candles, each opening within the prior body and closing near its low. Both patterns indicate trend conviction. Caution is warranted when these formations appear after extended moves—they can represent climax patterns. The reliability increases when the candles feature minimal upper wicks (for soldiers) or minimal lower wicks (for crows), indicating consistent directional pressure without rejection.
Piercing Line and Dark Cloud Cover
The Piercing Line is a two-candle bullish pattern: a bearish candle followed by a bullish candle that opens below the prior low but closes above the midpoint of the prior bearish body. This deep penetration signals buyers have overwhelmed sellers. Dark Cloud Cover is the bearish mirror: a bullish candle followed by a bearish candle that opens above the prior high but closes below the midpoint of the prior bullish body. Both patterns require the second candle to penetrate at least 50% into the first candle’s body for validity. These formations work best at support (Piercing Line) or resistance (Dark Cloud Cover) levels and gain reliability when accompanied by volume expansion.
Tweezer Tops and Bottoms
Tweezer patterns involve two consecutive candles with matching highs (Tweezer Top) or matching lows (Tweezer Bottom). A Tweezer Top forms when two candles test the same resistance level and fail, signaling selling pressure at that price. A Tweezer Bottom occurs when two candles test the same support level and hold, indicating buying interest. These patterns reflect precise price rejection at a specific level. While simple, they gain significance when the matching highs or lows align with prior swing points, round numbers, or Fibonacci levels. The pattern’s reliability improves when the second candle closes strongly away from the tested level.
Context, Confluence, and Confirmation
No candlestick pattern exists in isolation. The same Hammer that signals a powerful reversal at major support is meaningless in the middle of a choppy range. Effective candlestick analysis requires confluence: aligning patterns with support and resistance zones, trendlines, moving averages, Fibonacci retracements, and volume behavior. A Bullish Engulfing at the 61.8% retracement with above-average volume and bullish divergence on the RSI carries exponentially more weight than the same pattern in random noise. Confirmation is equally essential—waiting for the next candle to validate the signal reduces false positives. Risk management should incorporate the pattern’s structure: stops placed below the Hammer’s low or above the Shooting Star’s high provide logical, pattern-based risk levels.
Timeframe and Reliability Considerations
Candlestick patterns carry different reliability across timeframes. A Morning Star on the daily chart generally holds more significance than one on the five-minute chart, as higher timeframes reflect broader market consensus. However, patterns on lower timeframes can offer precise entry timing within higher-timeframe setups. Traders should analyze patterns on at least two timeframes—using the higher timeframe for directional bias and the lower for execution. Additionally, pattern reliability varies by asset class: candlestick signals developed for equities may behave differently in forex or crypto markets due to differing volatility profiles and trading hours. Backtesting patterns on the specific asset and timeframe before trading them with real capital is essential.
Common Pitfalls and Best Practices
The most frequent mistake is pattern over-identification—seeing hammers and engulfing patterns in every price bar. Quality matters more than quantity. Another pitfall is ignoring the broader trend: counter-trend patterns fail more often than trend-continuation patterns. Traders should also avoid acting on patterns without volume confirmation, as volume validates the conviction behind the price action. Finally, treating any single pattern as a complete trading system is a recipe for losses. Candlestick patterns are tools for reading market psychology, not crystal balls. They must be integrated into a comprehensive framework that includes trend analysis, risk management, and position sizing.

